
Paper Cup Projector

Age: Suitable for 5-10 years old
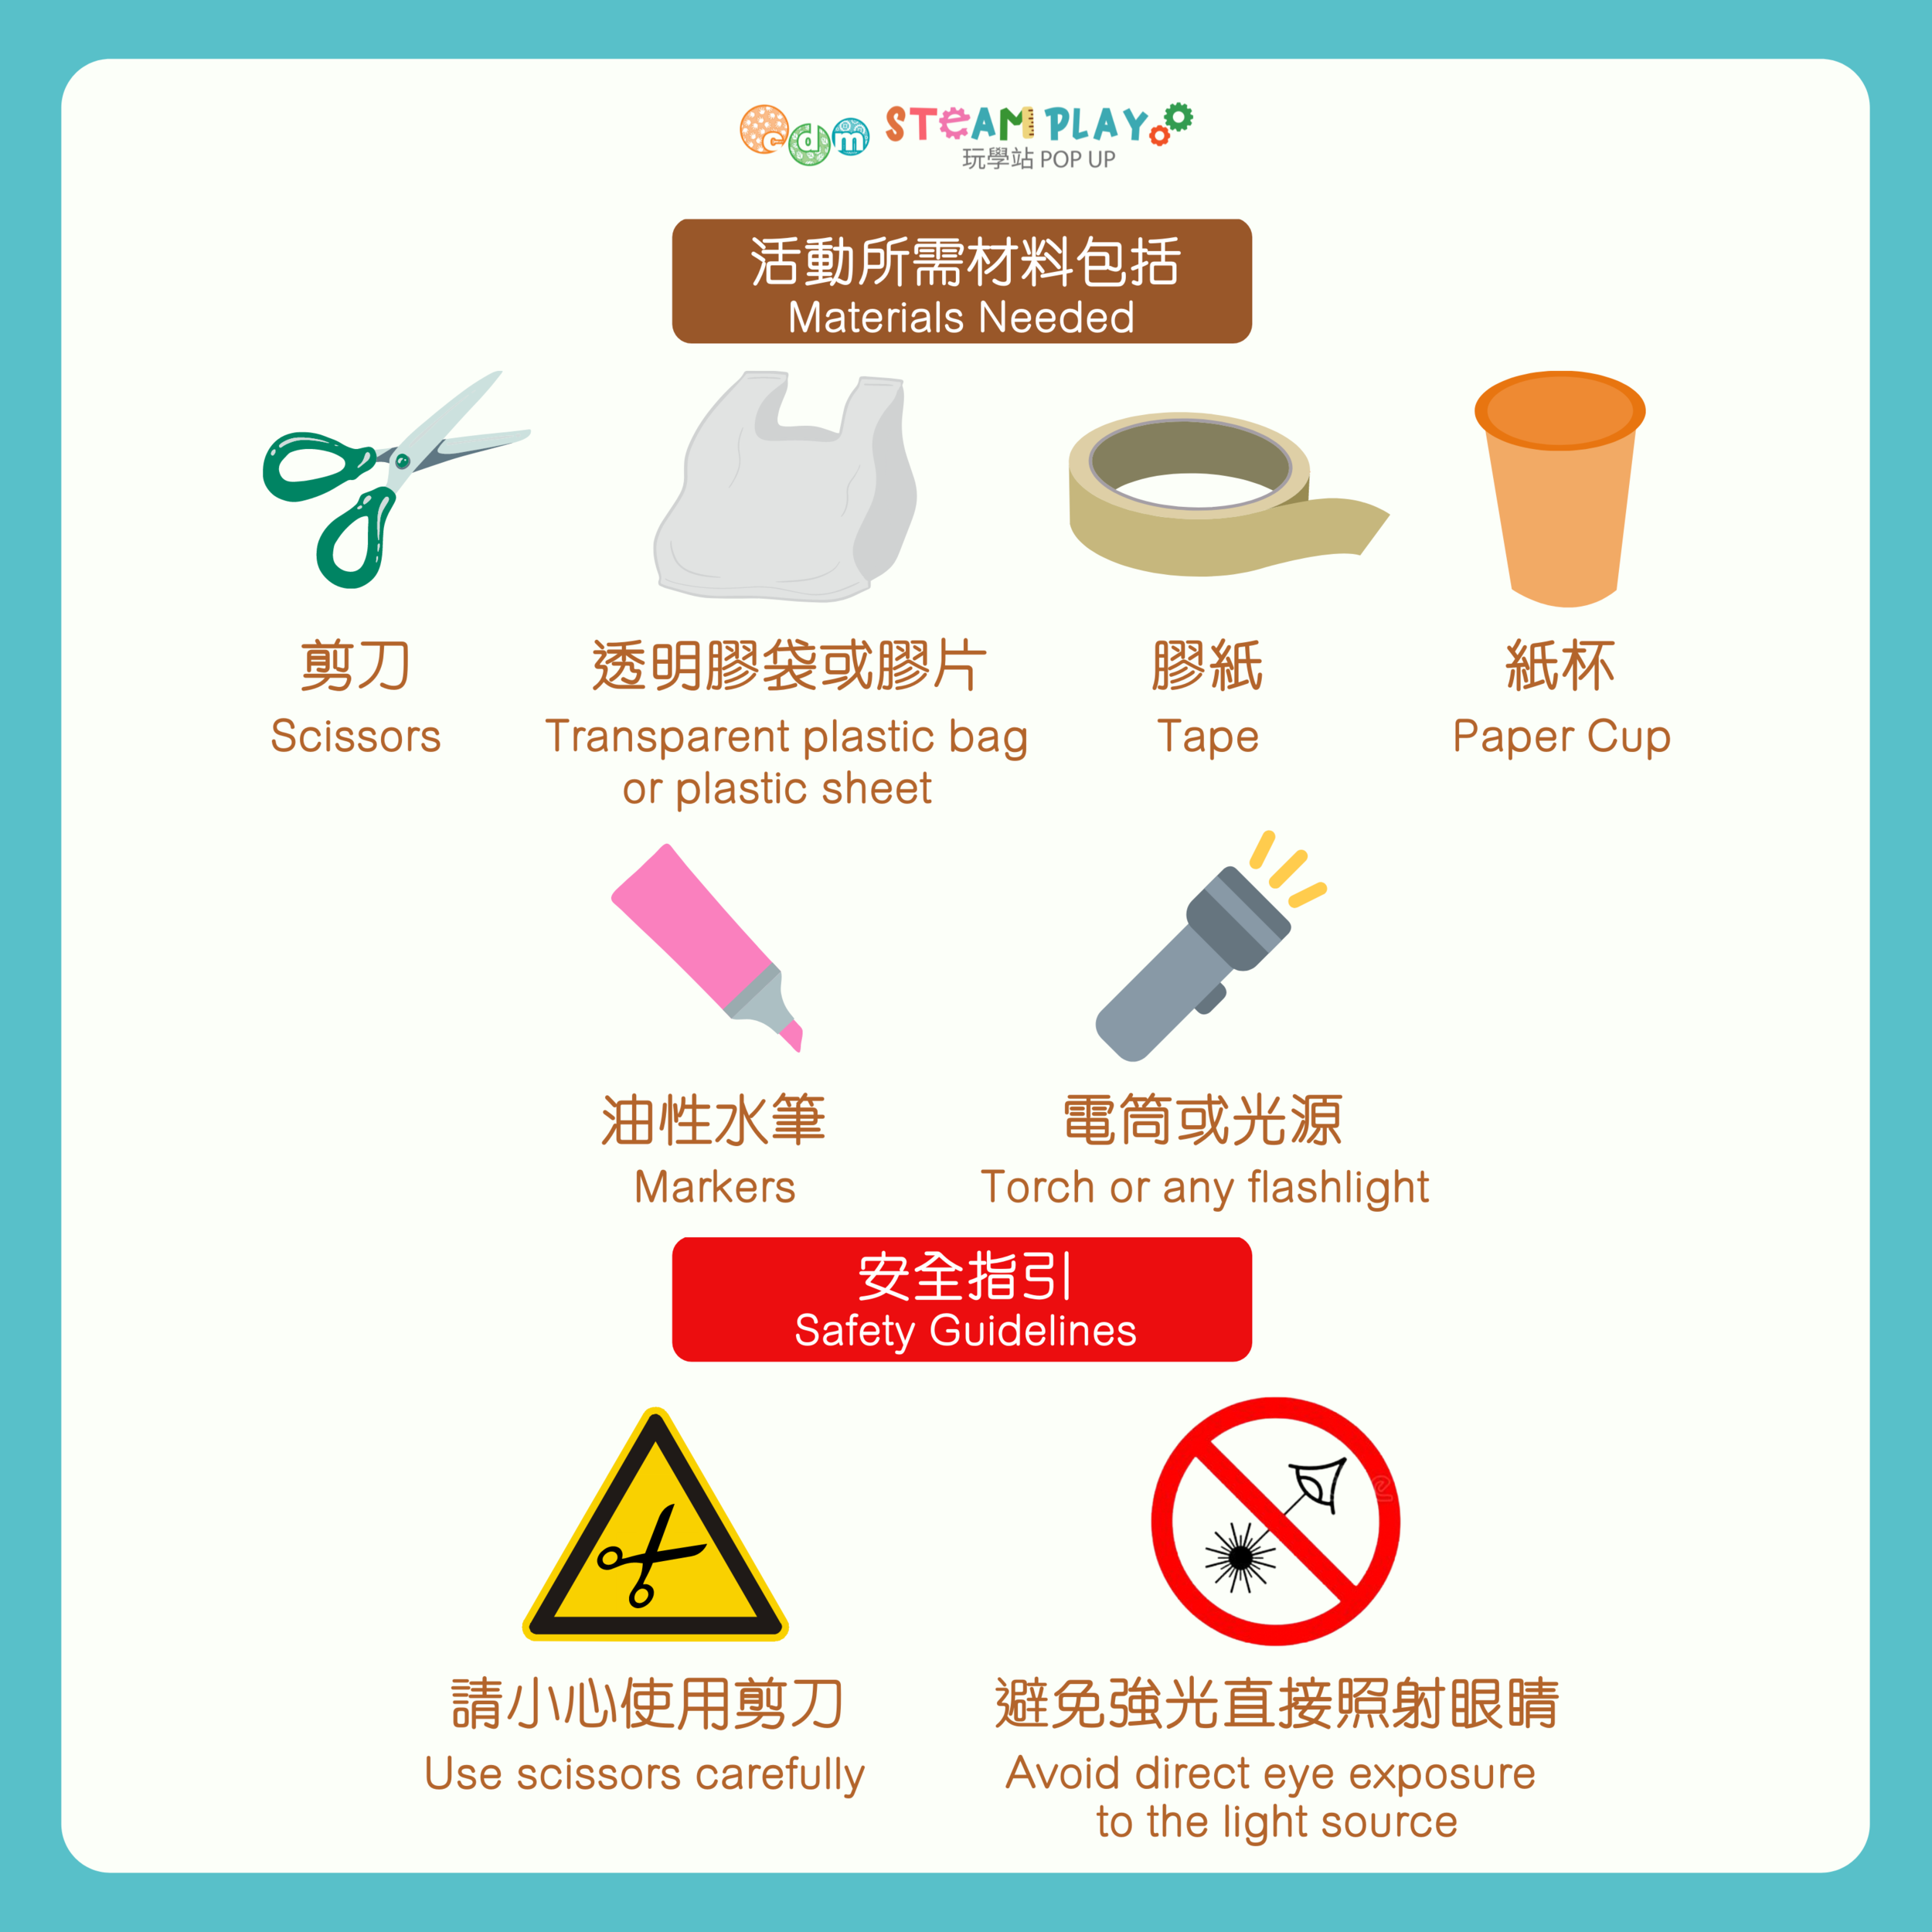
Materials required:
- Scissors
- Transparent plastic bag or plastic sheet (Save our Earth! Upcycle a package bag or wrapper!)
- Tape
- Paper Cup
- Markers
- Torch or any light source
Safety Guidelines:
- Use scissors carefully
- Avoid direct eye exposure to the light source
Steps:

1. Cut out the bottom of the paper cup.
2. Cut the transparent plastic bag or sheet into a piece that is larger than the paper cup (can be any shape you wish, as long as it is bigger than the paper cup).
3. Draw a picture with the markers on the newly cut out plastic sheet.
4. Attach the plastic sheet to the wider side of the paper cup with tape.
5. Place the torch on the other side of the cup, then project the image to the wall. You should be able to see how your image on the wall!
Different Ways to Play!
Try projecting the image on different surfaces, such as places that are dark or bright or change the distant of the light source to the wall.
While playing, see if your child can make relevant descriptions, such as: light, dark, big, small, etc.

What Children are Learning:
(1) Size comparison
Being able to distinguish the size of an object is a basic mathematical concept that lays the foundation for math readiness. When children can understand the concept of big and small, they can learn the concepts of area comparison, more/less, same or equal.
(2) Practice Observation Skills
Observation is a very important skill in scientific inquiry. Through observation, children can obtain new knowledge and their curiosity pushes them to think and question. For example: Can a shadow exist on its own? Is the size of a shadow fixed? Encourage children to pay attention to details and understand the changes of shadows.

Want to learn more? Join our【S.T.E.A.M Parent-Child Online Workshop】and #learningthroughplay together!